Cinematics
Linked video: Tutorial: How to Create Cinematic Dialogue in Narrative Pro
Narrative Dialogue can be used to create complex cinematic style cutscenes with dialogues all by using the built-in Unreal Sequencer tool.
Narrative features Sequencer additions to make it easier to create cinematic style cutscenes.
Below are the features added via Narrative with some context on how to use them alongside the Sequencer. This is not a full sequencer tutorial as that is an Unreal Engine feature.
CTRL + / is the Unreal hot key for splitting a track. It will be invaluable for creating sequences.
Creating a sequence
Firstly, create a new or open your existing sequencer.
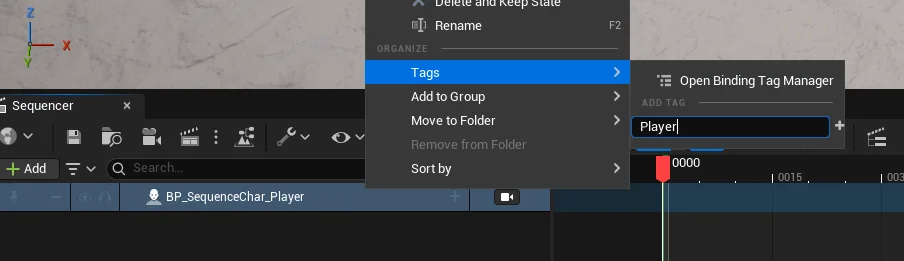
Add a new BP_SequenceChar into the world to control your player. Make sure to right-click the track, Tags -> add a new tag of Player for Narrative to bind correctly.
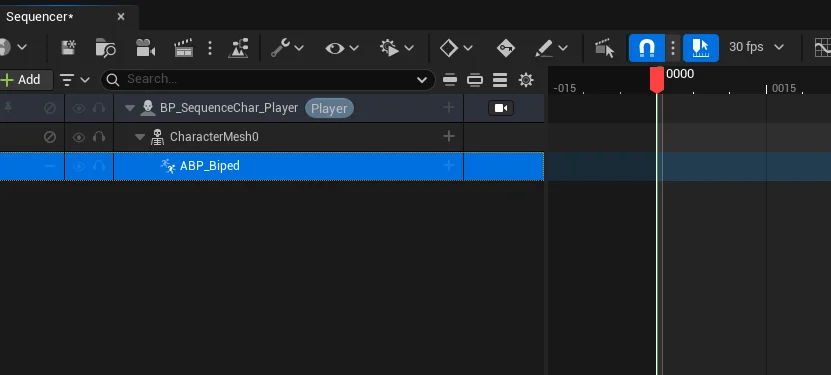
Click the Plus icon next to the PlayerChar track and add the CharacterMesh track and add the ABP_Biped from that track.
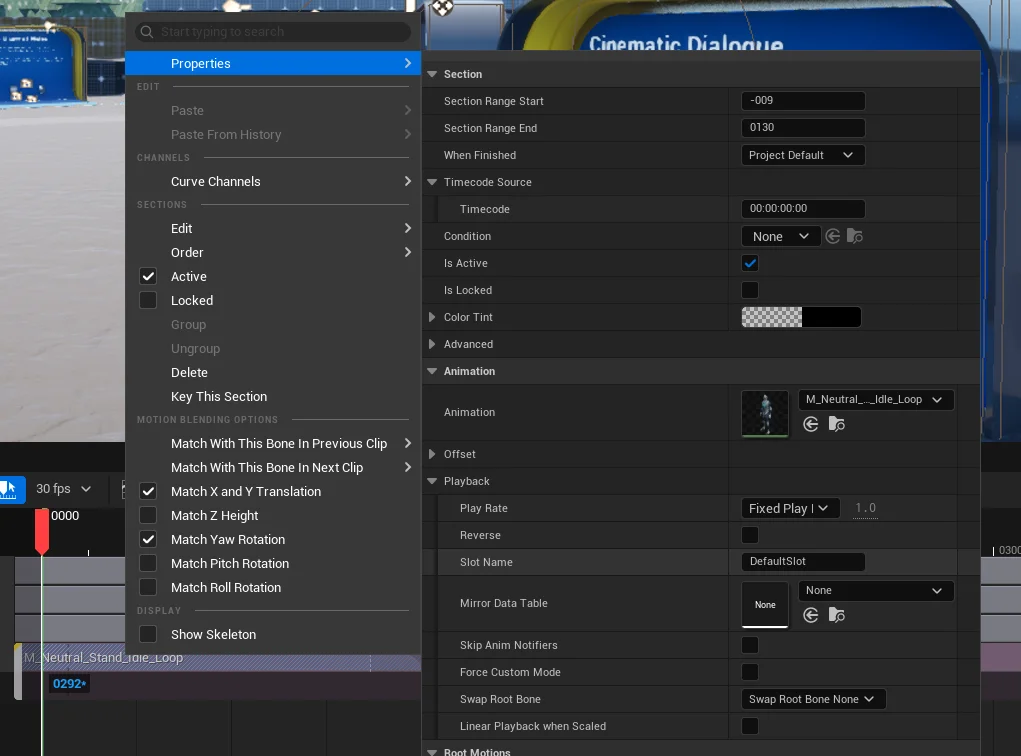
To add animations, click the plus icon next to the CharacterMesh track and add the animation you want.
Animations by default will not fade between animations when they are played.


You can add audio directly to the BP_SequenceChar track to play it.

Add another new BP_SequenceChar into the world to control your NPC. Make sure to right-click the track, Tags -> add a new tag that is the Speaker ID of your NPC for Narrative to bind correctly.
E.g. If your speaker ID is "Sinny", add "Sinny" as a gameplay tag.

Since both characters are built using the BP_SequenceChar you can copy and paste the CharacterMesh, ABP_Biped, Animation and audio tracks (transform too if you added that) onto the NPC from the Player to make it eaiser.

When you are ready to show the player options to select, you can use the Dialogue Track

Playing sequences
Narrative contains a built-in trigger to play a cutscene when the player walks into it. Drag BP_Trigger_Cutscene into your world to play a sequence using Narrative.
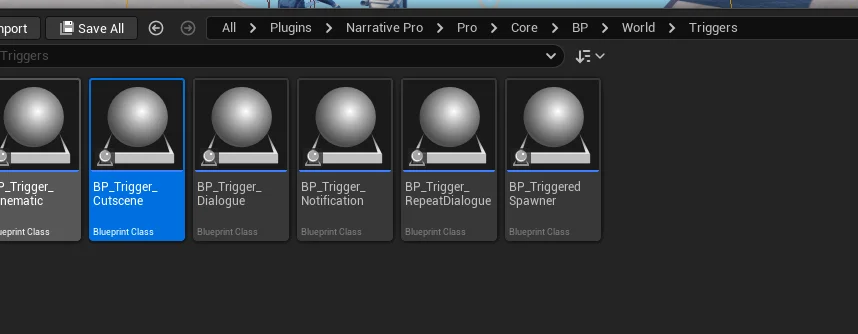
You can then set the Level Sequence and other options in the details panel of the BP_Trigger_Cutscene.
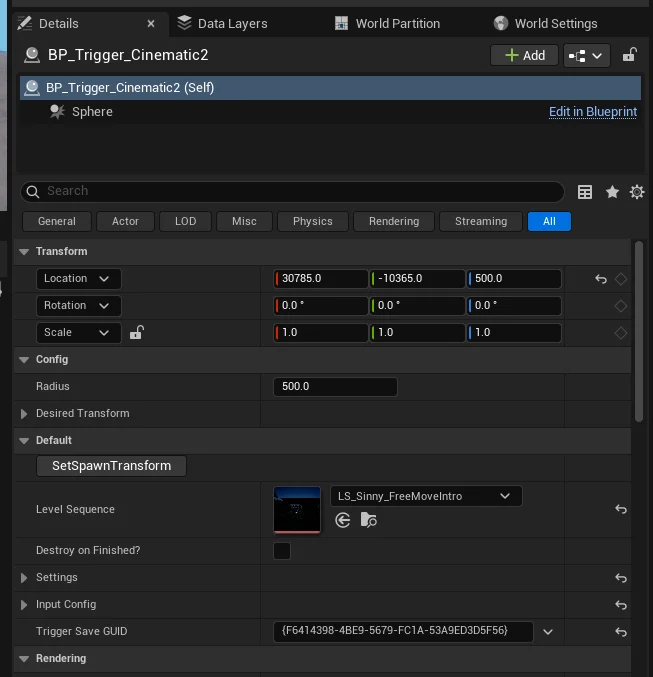
This trigger doesn't just call the default CreateLevelSequencePlayer and Play nodes. It handles binding correctly, locking the player and other key features.
If you want to play a sequence from another area, copy the code to make it work.
Player Controller
Narrative's Player Controller is expanded to give the sequencer extra control over the characters.
With your sequencer open, drag your player controller into the sequencers actor list panel. This will spawn a Dynamic controller in the world.
Next, right-click the controller and choose Convert to -> replaceable actor.
Finally, right-click the controller and choose Add binding tag -> PlayerController.
This will allow Narrative to replace the sequencer when it runs with the actual player controller.

Input control Track
Narrative contains a custom sequencer track that lets you stop and start when the player has control of their characters.
This is useful when you want to take or release input at specific times during your cinematic.
On your PlayerController track

Adding a keyframe to this track will allow you to control when the player has input control during your cinematic.
Add the track, then right-click and choose properties.
Here you can set which input settings you want t oset such as blocking just input, look movements or blocking both.
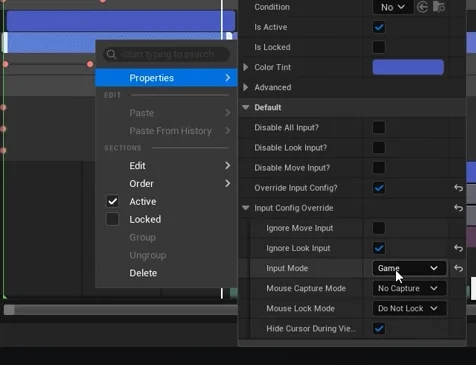
This track is a blueprint class located in /Narrative/Pro/Core/BP/Sequencer/Tracks/UI.
Gameplay Tag Track
The gameplay tag track allows you to set and remove gameplay tags directly to your characters. This allows you to change their states during cinematics.
Some examples of this could be telling characters to unequip weapons, abilities, or forcing them into a certain state such as walking.

This track is a blueprint class located in /Narrative/Pro/Core/BP/Sequencer/Tracks/UI.
You add the skip track onto the BP_SequenceChar.
Skip Track
The skip-track controls where a sequence skips to when the player presses the skip button.
This lets you control exactly where the sequence skips to when the player presses the skip button instead of just skipping the entire sequence.

This track is a blueprint class located in /Narrative/Pro/Core/BP/Sequencer/Tracks/UI.
You add the skip track onto the player controller.
Dialogue Track
This track is used to add dialogue options onto the screen for the players to select.

Add the dialogue track and add a keyframe to it. You can now right-click on it and choose its dialogue options to select which options are available and which sequence it takes you to.
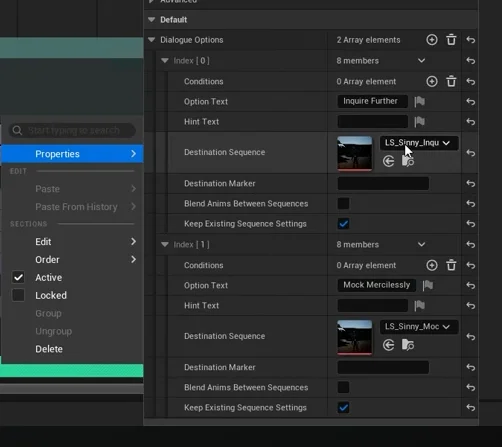
The dialogue track has several settings that allow you to create better sequences:
- Blend Anims Between Sequences: This allows you to blend between animations when the dialogue track changes sequence. This is useful for creating smooth transitions between sequences.
- Keep Existing Sequence Settings: Ticking this will use the same sequencer settings as the previous sequence (start times, looping, binding configs). Unticking it will allow you to override them.
This track is a blueprint class located in /Narrative/Pro/Core/BP/Sequencer/Tracks/UI.
Looping
The dialogue track has also built to loop the sequence at that point for the length of the dialogue track. This allows you to watch that part of the sequence on loop until the player selects an option.
Widget Track
The widget track allows you to add widgets to the UI inside a sequence. This is useful for adding UI elements to show the player such as buttons, text, and images.

You can set the length of the track to automatically handle hiding the widget.
This track is a blueprint class located in /Narrative/Pro/Core/BP/Sequencer/Tracks/UI.
Characters
Narrative includes a blueprint class called BP_SequenceChar that you can use inside sequences to give you a preview of the character in the sequence.
This is a lightweight character that lets you build your sequence without having to create a full character.

Only add a transform track to your sequence for characters if you want to move the character to that location.
Keeping tracks without a sequence will make them play from where-ever they are in the world.
You can also move a transform keyframe midway through a sequence if you want to control when the character moves.
Cameras
Narrative for cinematic sequences simply uses the build in Sequencer camera system. We won't cover it here, but you can find more information in the Sequencer documentation.
You can also use any camera plugins as long as they support the Sequencer camera system.
Fading
You can make a camera fade in or out by using the normal sequencer Camera Cuts track. Right-click the track and choose Can Blend.
Now drag the top yellow arrow forward or backward to make the camera fade in or out.

Camera Focus
Sometimes your camera won't focus on the right actor in the scene, causing the shot to be blurry.

You can fix this by selecting the camera in the sequence and either selecting the actor you want to focus on in the scene or setting the camera Manual Focus Distance on the camera or using keyframes.

Camera Black Bars
By default, Unreal cine cameras have large black bars either side of the screen to add a cinematographic look. This isn't for everyone.
To fix this, select your camera and untick the Constrain Aspect Ratio flag.

Custom variables
You might want to sometimes allow the sequencer to control or see a variable stored on your characters. You can do this by selecting the variable and ticking the Expose to Cinematics flag.

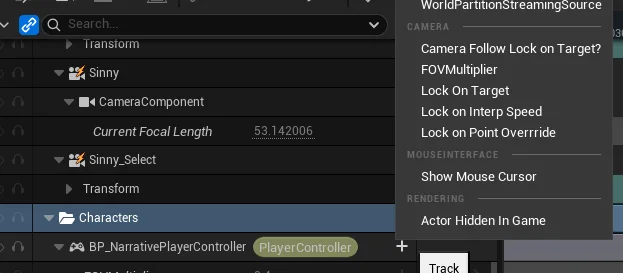
Blending between sequences
When using multiple sequences, it is common that you will run into issues with cameras or animations not blending correctly.
You can fix this by using the custom features Sequencer Blend In and Sequence Blend Out options.

These will let you control how the camera and animations blend between sequences instead of snapping.
Slot-based animations
You can also play animations in a specific animation slot. This lets you play animation on specific parts of the body instead of a full-body controlled animation.