Dialogue
Dialogue is a feature rich core system that allows you to create complex AAA dialogue with ease.
You can adjust anything from speakers, cameras, text, audio, sequences with a bunch of easy to understand settings.
Creation
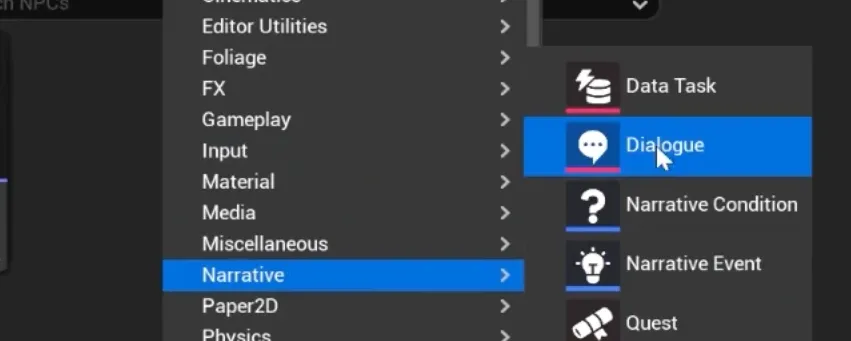
Create a new dialogue by right-clicking in the Content Drawer -> Narrative -> Dialogue.

Tabs
Here you will see two tabs. The Dialogue Graph and the Event Graph.
The Event Graph is where you can overwrite dialogue functions and add additional code to make your dialogue perform how you want.
The Dialogue Graph is how you build up the dialogue with dialogue nodes.
Class Defaults
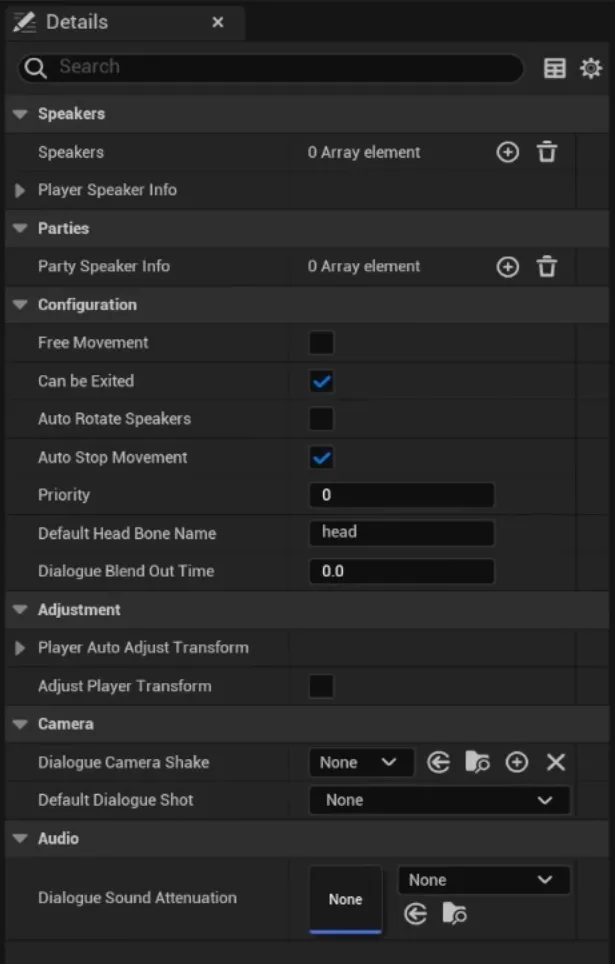
Click the Class Defaults button at the top, and we can now populate the Dialogues default settings.
The class defaults give you access to modify how your dialogue will work. It lets you change the speakers in the dialogue, camera settings, character settings and more.

Dialogue Properties
| Name | Type | Description |
|---|---|---|
| Speakers | TArray<FSpeakerInfo> | All the NPC speakers in this dialogue. |
| PlayerSpeakerInfo | FPlayerSpeakerInfo | The speaker info for our player. |
| PartySpeakerInfo | TArray<FPlayerSpeakerInfo> | For parties, each player in the party gets their own speaker info. |
| bFreeMovement | bool | If true, narrative UI won't show mouse cursor and set input mode to UI. You'll still be able to control your player. |
| bCanBeExited | bool | If false, default UI will disallow closing of the dialogue with ESC. You need to wait for it to end. |
| bAutoRotateSpeakers | bool | If enabled, narrative will automatically rotate the speakers to face whoever is currently talking. |
| bAutoStopMovement | bool | Automatically stop the characters' movement when the dialogue begins to line up the camera shot correctly. |
| Priority | int32 | Priority. Lower values are more important. If a dialogue attempts to play with a higher priority, it will be discarded. |
| DefaultHeadBoneName | FName | By default, Narrative will aim the camera at the bone named "head". If your head bone has a different name, input it here. |
| DialogueBlendOutTime | float | Time to blend back into the player's camera after the dialogue ends. |
| PlayerAutoAdjustTransform | FTransform | In 1-on-1 dialogue, automatically adjusts the player's position so they stand the desired amount of units away. |
| bAdjustPlayerTransform | bool | If enabled, we'll adjust the player to be at PlayerAutoAdjustTransform relative to the other speaker. Only used in 1-on-1 dialogue. |
| DialogueCameraShake | TSubclassOf<UCameraShakeBase> | Camera shake the dialogue camera will play. |
| DialogueSoundAttenuation | USoundAttenuation | The attenuation to use for dialogue lines. |
| DefaultDialogueShot | UNarrativeDialogueSequence | If a shot, its speaker, etc., doesn't have a shot, the dialogue will use this one as a default. |
Copy and pasting
Dialogue can be a time-consuming task to write and often, writers will not use Unreal to write the story and script. Narrative supports a copy-and-paste standard to help create dialogue faster.
You can create Dialogue simply by copying the speaker ID and text in the following format.
SpeakerID: Text
For example:
Reubs: Hey! Welcome to Narrative
Dan: Thanks!
Player: Who is Dan?
Reubs: Everyone knows Dan! You just need to decrypt it...
Narrative will take this and automatically create the speakers if they do not exist, create all the nodes and joint them the best it can.
Narrative does not let you import from Excel files, CSV’s or any other media.
Copying and pasting dialogue nodes have been disabled until further notice.
It was causing corruption in assets and until it can be resolved up to the high Narrative standard, it has been removed.
Player Name
Narrative Pro allows you to set a default name for your player. Simply go to Edit -> Project Settings -> Narrative Pro.
Set the Default Username to the name you want for the player.
If you want to use the default username, leave this blank, and it will load the platform name (steam username, PlayStation PSN)
You can also override this using the ChangeName node.
Comments
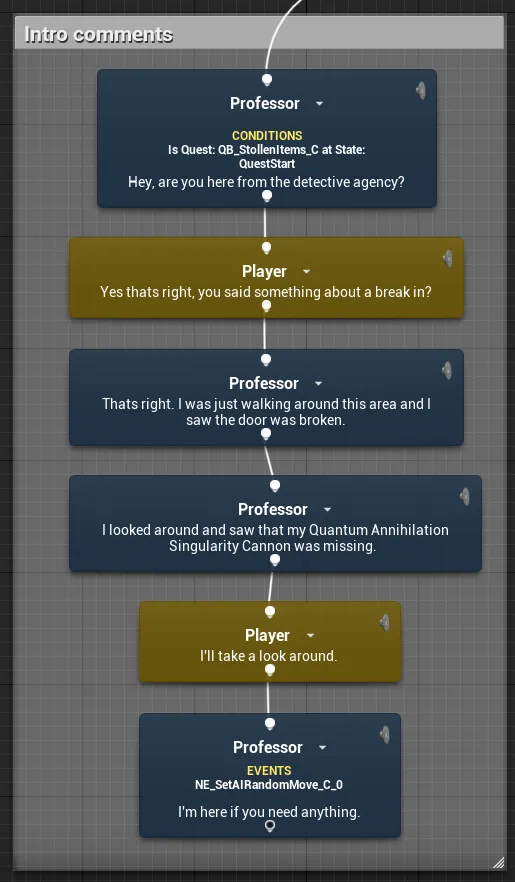
You can add Unreal's comments around your dialogue to organise them or make them easier to debug at a glance.
Simply highlight your dialogue nodes and hit the C key to add the comment.
