Loot Tables
Loot tables are used to provide items to Inventories, whether it's the players, a trader or a blueprint.
If you are coming from an older version of inventory, you will have used a DefaultItems array. This has been replaced by the Loot Tables for more advanced flexibility.
Loot Table Creation
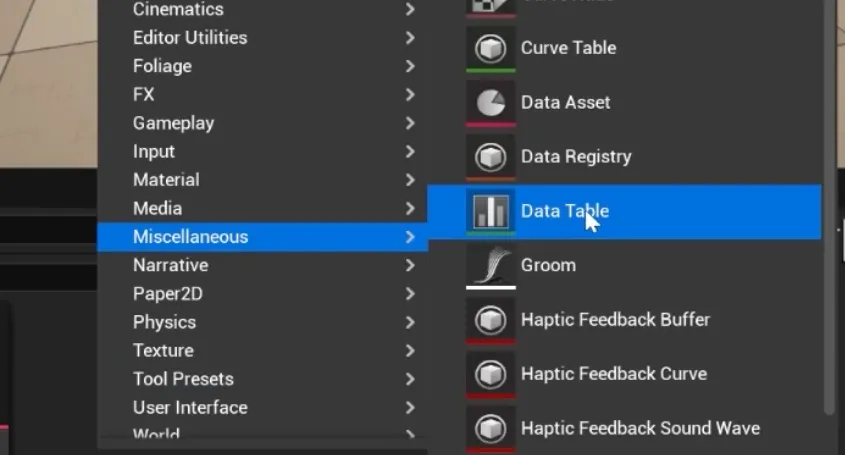
To create a new loot table, Right Click in the Content Drawer -> Miscellaneous -> Data Table.

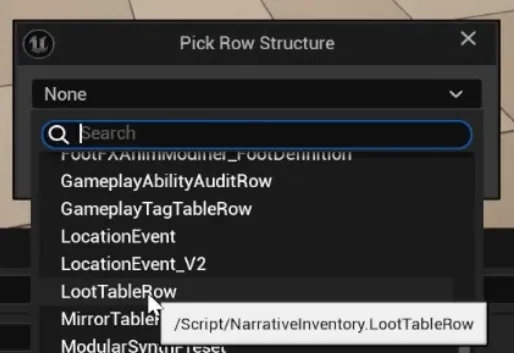
Select the LootTableRow data structure.

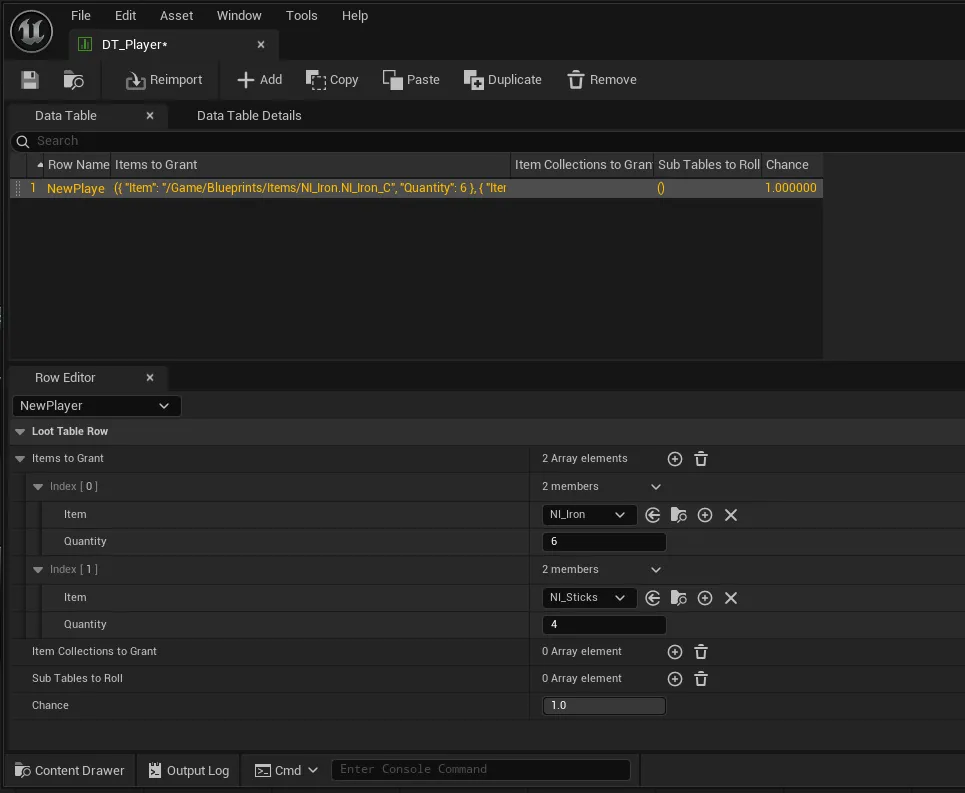
You can now populate all the items the Loot Table needs to use.

LootTableRow Properties
| Variable Name | Type | Description |
|---|---|---|
| ItemsToGrant | TArray<FItemWithQuantity> | The items to grant if this row is given to the inventory |
| ItemCollectionsToGrant | TArray<TObjectPtr<UItemCollection>> | Item collections to grant |
| SubTablesToRoll | TArray<FLootTableRoll> | Subloot tables that this loot table will roll |
| Chance | float | The chance this row will actually be given if selected |
FItemWithQuantity Properties
| Variable Name | Type |
|---|---|
| Item | TSoftClassPtr<UNarrativeItem> |
| Quantity | int32 |
UItemCollection Properties
| Variable Name | Type |
|---|---|
| Items | TArray<FItemWithQuantity> |
FLootTableRoll Properties
| Variable Name | Type |
|---|---|
| TableToRoll | TObjectPtr<UDataTable> |
| NumRolls | int32 |
| Chance | float |
Adding items
Once you have populated your loot table with items, you can assign the Loot Table to the Inventory.
Select the inventory component and add as many Loot Tables as you wish to run through for the inventory.
Running the loot table
You now have to decide when you want the loot table to be added to the Inventory.
For some inventories, simply applying the loot table on Event Begin Play will be fine.
To apply the loot table, drag in your Inventory component and call the Give Default Items function.
Saving / Loading
However, for inventories that need to be saved and loaded, it will be common practice to only apply the loot table if it is not loading.
A branch or a check can be added. An example of this is displayed below.