Player State
Before we can move on, we need to create a custom PlayerState.
If you already have a custom PlayerState, you can skip this step and go to Component Location
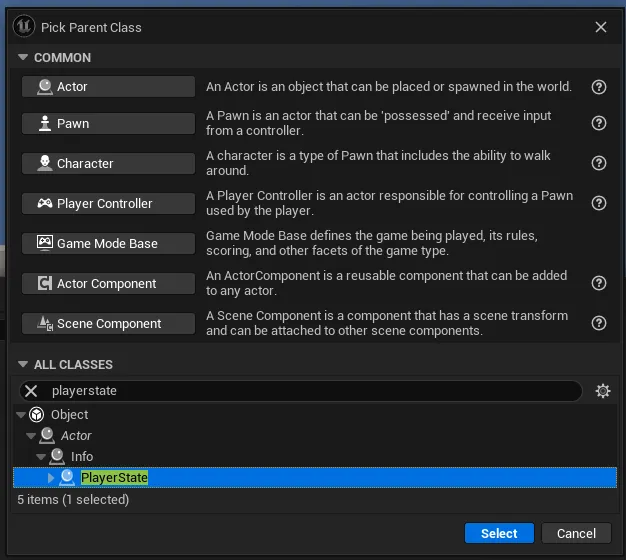
Simply right-click in your Content Drawer, select Blueprint Class and choose Player State. We will name this BP_PlayerState.

Now open the BP_ThirdPersonGameMode and set the Player State class to your newly created BP_PlayerState.
Component location
This highly depends on what your game is and how you want it to work.
The Narrative Inventory component has been created, so you can create an inventory, anywhere, on any blueprint. You simply assign the component to the blueprint.
If you want a chest to store items, give the blueprint an inventory, set its friendly name to be Chest and set its default items.
If you want to give an NPC items, give the blueprint an inventory, set its friendly name to be the NPC’s name and set its default items.
If you are adding an inventory for your player, we highly recommend you place the Narrative Inventory Component on the Player State whether you are creating a multiplayer game or not. This ensures uniformity across the plugin and is one less thing you have to do if you ever decide to move to a multiplayer game.
However, there will always be reasons why putting it on the player state won’t work for you (and that's okay!) so Narrative Inventory comes with some nodes to help you find your inventory.
There is a bug in Narrative Inventory 1.7.0 which requires the players Inventory to be on the player state. This is fixed in Narrative Inventory 2.0.0.
Begin Looting
For the looting system to work, you need to hook into the OnBeginLooting event of the Inventory component.
Simply right-click on the inventory component -> Add Event -> OnBeginLooting. Get the players HUD and call Open Menu for the W_NarrativeMenu_Looting widget.